vagrantを使った仮想マシンの作成手順

はじめに
vagrantは非常に便利なツールです。これまではVirtualBoxやVMWare上でisoファイルを指定し、設定項目入力して〜のような作業を行って仮想マシンを作成していましたが、vagrantを使うことでこれらの作業をコマンド1つで完了することができます。開発環境のために仮想マシンを用意するなど、仮想マシンを作成する作業が頻繁に必要な場合はvagrantによってだいぶ楽になると思います。他にも色々メリットがあるvagrantですが、使い始めてだいぶ慣れた気がするのでvagrantで仮想マシンを作成する手順を備忘録としてメモしておきます。なお、以下のサイトがvagrantを使うメリットについてまとめてあって参考になりました。
Vagrantって流行ってるらしいけど何が便利なの? | Developers.IO
環境と前提
- VirtualBoxやVMWareの仮想環境ソフトがインストール済である環境 (以降ではVirtualBoxを使用します。)
Windowsでvagrantを使う場合はUNIXシェル環境を準備
vagrantを使うためには、sshコマンド等を使うためのUNIXシェル環境が必要となります。WindowsにはデフォルトでUNIXシェル環境がないため、以下のURLからGit for Windowsをダウンロードし、インストールしておきます。Git for Windowsのおかげで、完全なUNIXシェル環境ではないものの非常に簡単にUNIXシェル環境を整備できます。
Git for Windowsなお、Git for Windowsのインストール手順を以下にまとめているので必要な方は見てみてください。
Windows用のお手軽なUNIXシェル環境としておすすめなGit for Windows (Git Bash)
vagrantのダウンロードとインストール
以下のURLのvagrantのHPにアクセスします。
Vagrant
アクセスすると以下のような画面になると思うので、「DOWNLOAD」をクリックします。
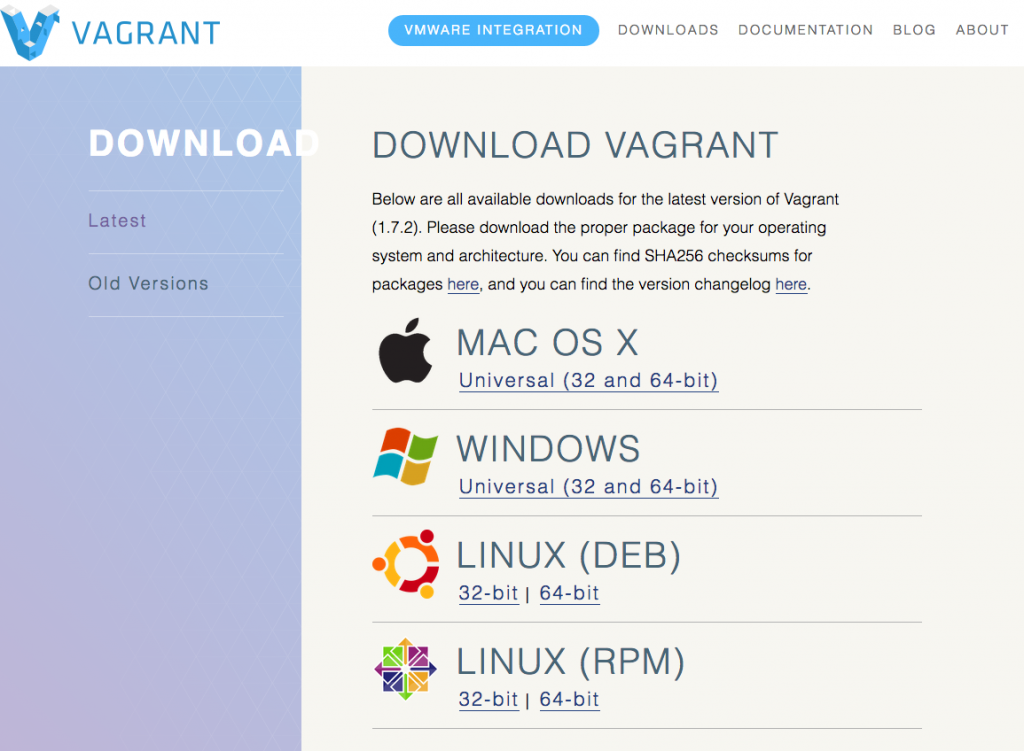
 すると以下の画面が表示されるので、各自のOSに合わせて選択します。
ダウンロード完了したら、インストーラを起動しインストールを行います。
Windowsの場合のインストール手順
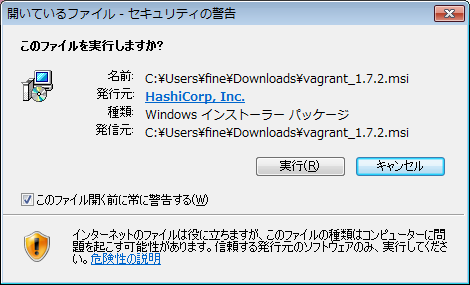
インストーラを起動し以下の画面の「実行」をクリックします。
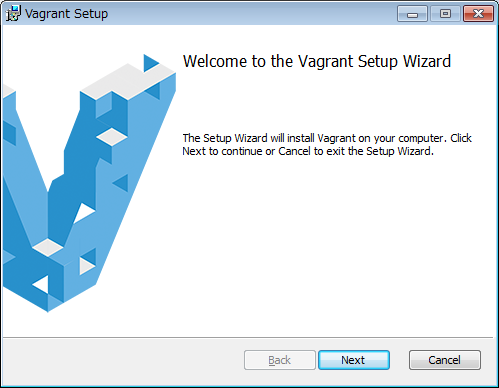
以下の画面で「Next」をクリックします。
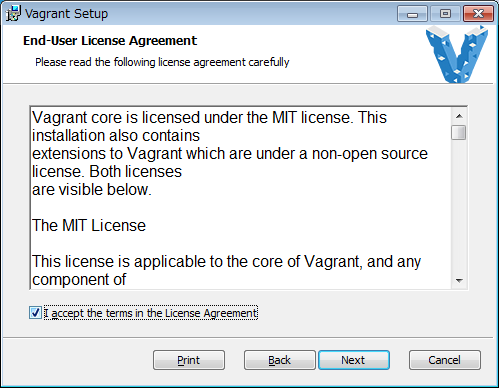
「I accept the terms in the License Agreement」にチェックを入れて「Next」をクリックします。
vagrantのインストール先を指定します。特に希望がなければデフォルトのままでいいと思います。

「Install」をクリックしてインストールを開始します。

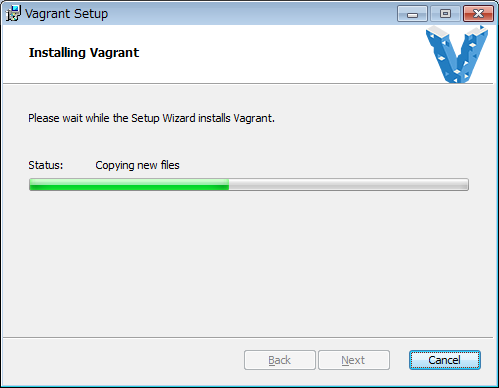
インストールが始まります。
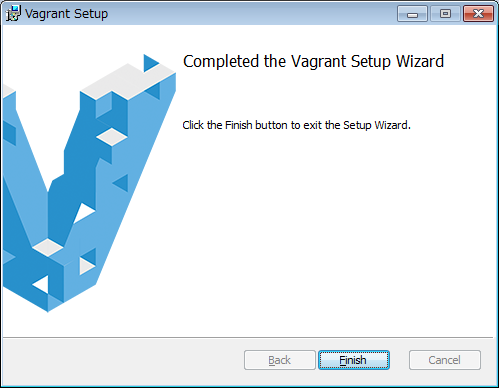
以下の画面が表示されればインストール完了です。「Finish」をクリックします。
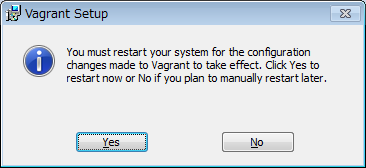
vagrantのインストールが完了すると、以下のように再起動するよう促されます。もしすぐに再起動しても良いなら「Yes」を、後ほど自分のタイミングで再起動したい場合は「No」をクリックします。再起動したらインストールは完了です。
最後に、Git bashを開いて以下のコマンドを実行し、vagrantのバージョンが表示されれば正常にインストールできています。
$ vagrant -v
vagrant 1.7.2
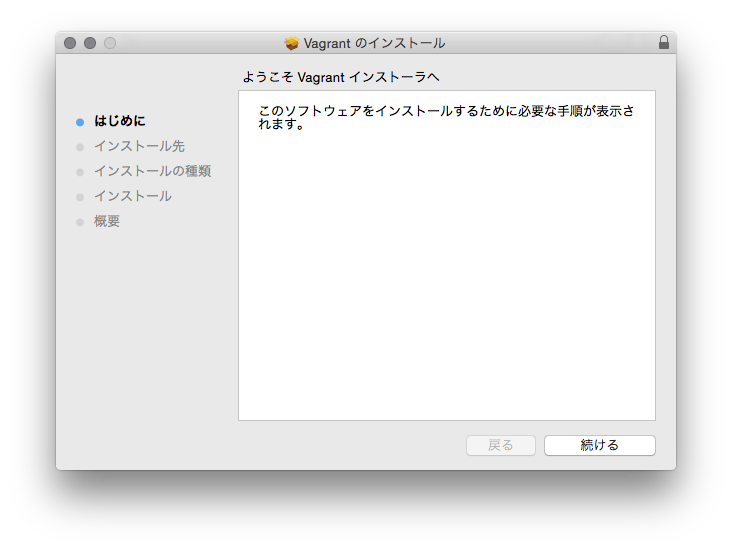
Macの場合のインストール手順
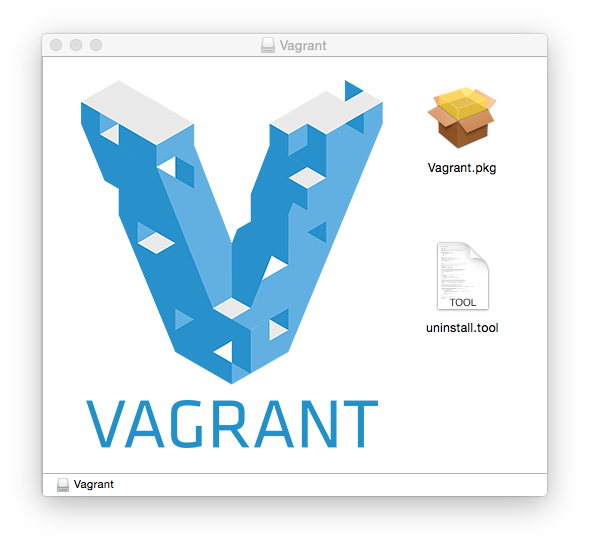
インストーラを起動すると以下の画面が表示されるので「Vagrant.pkg」を開きます。
続いて以下の画面が表示されるので「続ける」をクリックします。
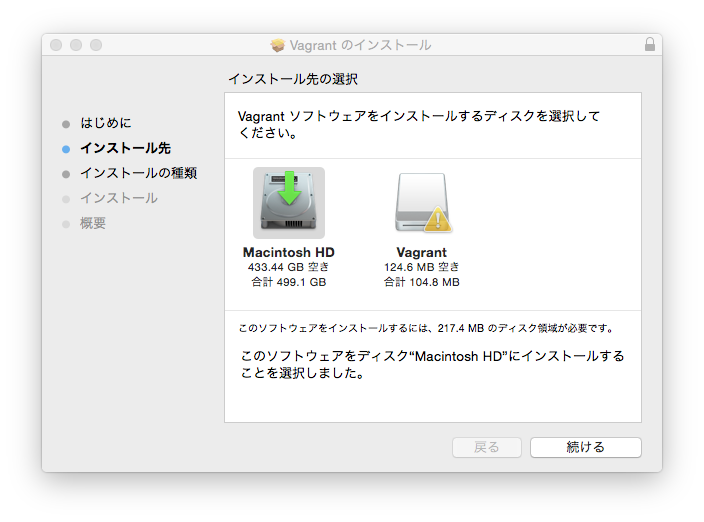
インストール先を選択して「続ける」をクリックします。
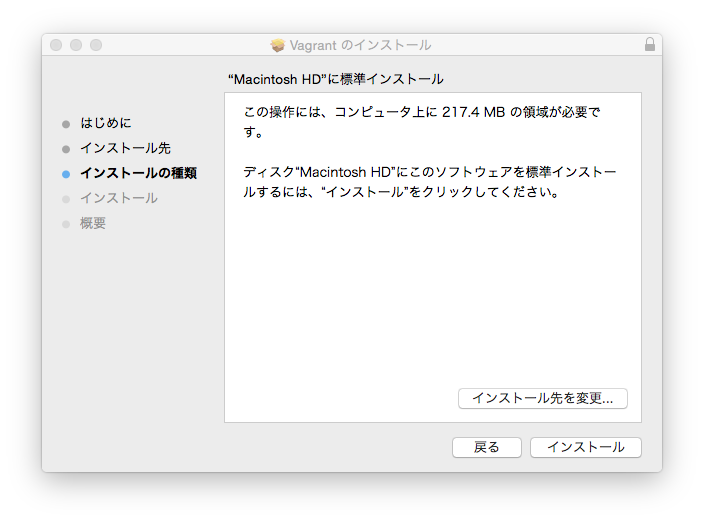
インストール先を確認されるのでよければ「インストール」をクリックしインストールを開始します。
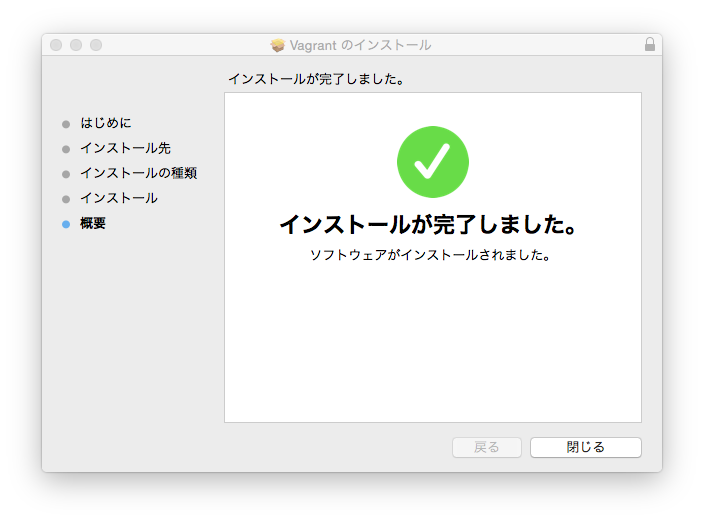
インストールが完了すると以下の画面が表示されます。「閉じる」をクリックして完了です。
最後に以下のターミナルを開いて以下のコマンドを実行し、vagrantのバージョンが表示されれば正常にインストールできています。
$ vagrant -v
vagrant 1.7.2
vagrantを使って仮想マシンを作成
vagrantのインストールが完了したら、vagrantのコマンドを使用して仮想マシンを作成します。まず、vagrant用のフォルダをmkdirで作成し、そのフォルダにcdコマンドで移動します。ここではvagrantという名前のフォルダにしています。
$ mkdir vagrant
$ cd vagrant
今度は今から作成する仮想マシン用のフォルダを作成し、そのフォルダに移動します。ここでは、ubuntu-vagrantというフォルダ名にしておきます。
$ mkdir ubuntu-vagrant
$ cd ubuntu-vagrant
続いて以下のコマンドで仮想マシンをインストールする準備を行います。
$ vagrant init
A `Vagrantfile` has been placed in this directory. You are now
     ready to `vagrant up` your first virtual environment! Please read
     the comments in the Vagrantfile as well as documentation on
     `vagrantup.com` for more information on using Vagrant.
vagrant initを実行すると、ubuntu-vagrantフォルダにVasgrantfileという名前のファイルが作成されます。このファイルに今から作成する仮想マシンの設定を記述します。例えば、どのディストリビューションの仮想マシンを作成するか、割り当てるメモリ量、ネットワークの設定などです。
Vagrantfileをテキストエディタで開くと、以下の様な内容になっていると思います。
  # -*- mode: ruby -*-
  # vi: set ft=ruby :

  # All Vagrant configuration is done below. The "2" in Vagrant.configure
  # configures the configuration version (we support older styles for
  # backwards compatibility). Please don't change it unless you know what
  # you're doing.
  Vagrant.configure(2) do |config|
    # The most common configuration options are documented and commented below.
    # For a complete reference, please see the online documentation at
    # https://docs.vagrantup.com.

    # Every Vagrant development environment requires a box. You can search for
    # boxes at https://atlas.hashicorp.com/search.
    config.vm.box = "base"

    # Disable automatic box update checking. If you disable this, then
    # boxes will only be checked for updates when the user runs
    # `vagrant box outdated`. This is not recommended.
    # config.vm.box_check_update = false

    # Create a forwarded port mapping which allows access to a specific port
    # within the machine from a port on the host machine. In the example below,
    # accessing "localhost:8080" will access port 80 on the guest machine.
    # config.vm.network "forwarded_port", guest: 80, host: 8080

    # Create a private network, which allows host-only access to the machine
    # using a specific IP.
    # config.vm.network "private_network", ip: "192.168.33.10"

    # Create a public network, which generally matched to bridged network.
    # Bridged networks make the machine appear as another physical device on
    # your network.
    # config.vm.network "public_network"

    # Share an additional folder to the guest VM. The first argument is
    # the path on the host to the actual folder. The second argument is
    # the path on the guest to mount the folder. And the optional third
    # argument is a set of non-required options.
    # config.vm.synced_folder "../data", "/vagrant_data"

    # Provider-specific configuration so you can fine-tune various
    # backing providers for Vagrant. These expose provider-specific options.
    # Example for VirtualBox:
    #
    # config.vm.provider "virtualbox" do |vb|
    #   # Display the VirtualBox GUI when booting the machine
    #   vb.gui = true
    #
    #   # Customize the amount of memory on the VM:
    #   vb.memory = "1024"
    # end
    #
    # View the documentation for the provider you are using for more
    # information on available options.

    # Define a Vagrant Push strategy for pushing to Atlas. Other push strategies
    # such as FTP and Heroku are also available. See the documentation at
    # https://docs.vagrantup.com/v2/push/atlas.html for more information.
    # config.push.define "atlas" do |push|
    #   push.app = "YOUR_ATLAS_USERNAME/YOUR_APPLICATION_NAME"
    # end

    # Enable provisioning with a shell script. Additional provisioners such as
    # Puppet, Chef, Ansible, Salt, and Docker are also available. Please see the
    # documentation for more information about their specific syntax and use.
    # config.vm.provision "shell", inline: <<-SHELL
    #   sudo apt-get update
    #   sudo apt-get install -y apache2
    # SHELL
  end
まずはVagrantfileの冒頭にある以下の部分を変更します。config.vm.box = "base"という部分で作成する仮想マシンのboxを指定しています。
  # Every Vagrant development environment requires a box. You can search for
  # boxes at https://atlas.hashicorp.com/search.
  config.vm.box = "base"
なお、vagrantにおけるboxとは、こちらのvagrant日本語ドキュメント (非公式ではありますが、公式のVagrant Docsの日本語訳を掲載しており大変参考になりました。)で以下のように説明されています。
ゼロから仮想マシンをインストールする代わりに(それは時間が掛かり、また退屈な作業です)、 Vagrantは、仮想マシンをすばやくクローンするためにベースイメージを使用します。 これらのベースイメージは、Vagrantでは box として知られています。 そして、あなたのVagrant環境で使用するためにboxを指定することは、 Vagrantfileを作成した後に常に最初に行うステップです。よってまずvagrantではboxを指定します。使用できるboxの一覧が以下のURLに載っています。boxには純粋なLinuxディストリビューションだけでなく、あらかじめ色々なソフトウェアを使える状態にしてあるboxもあります。
ATLAS
今回は純粋なubuntu server 14.04 64bitの仮想マシンをvagrantで作成したいと思います。そのためにまず上記URLにアクセスします。以下の画面が表示されると思います。
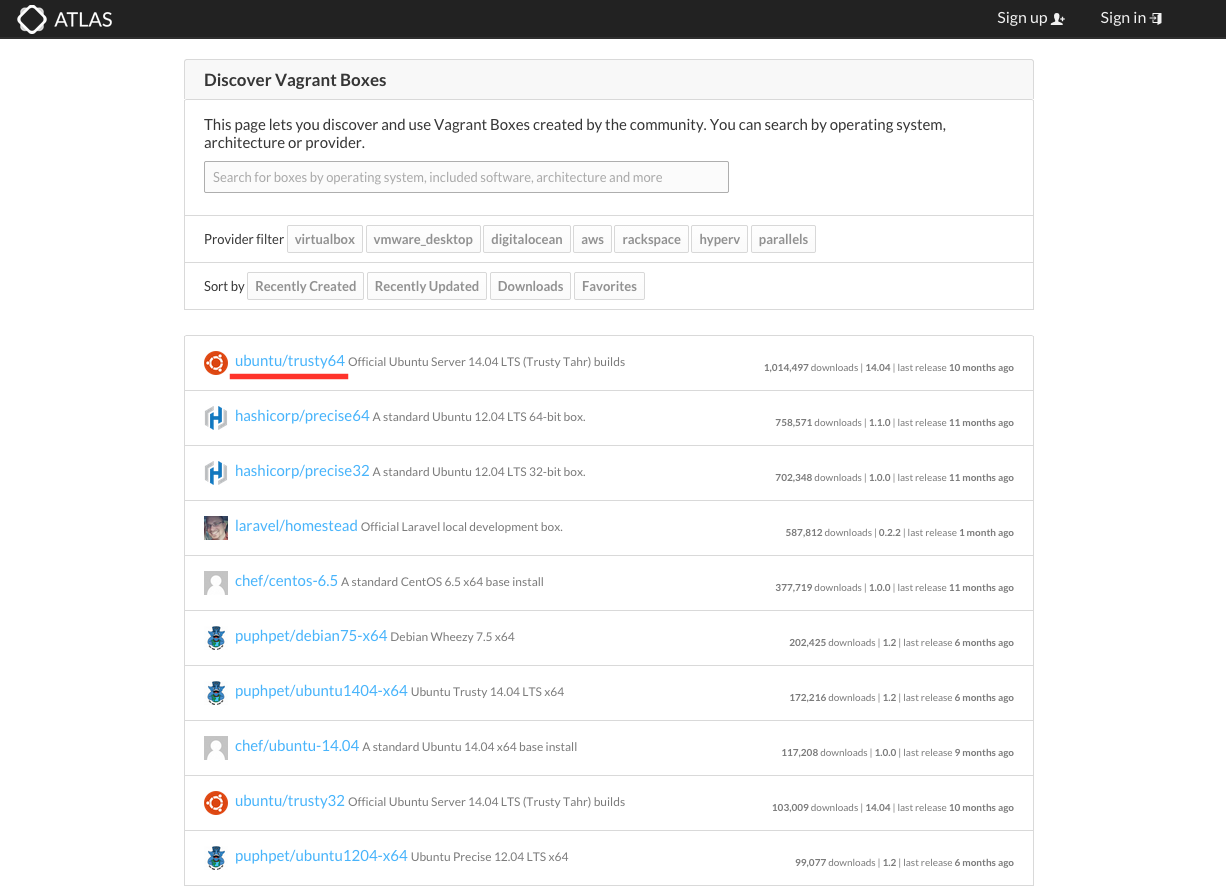
上の画面の中の赤線部分がbox名になります。このbox名(上画面の場合だとubuntu/trusty64)をVagrantfile内のconfig.vm.boxの値として記述します。例えば、 ubuntu/trusty64のboxを使用する場合は、以下のようになります。
  # Every Vagrant development environment requires a box. You can search for
  # boxes at https://atlas.hashicorp.com/search.
  config.vm.box = "ubuntu/trusty64"
後は以下のコマンドを実行すれば、指定したboxの仮想マシンがインストールされ、起動します。
$ vagrant up
もしvagrant upを実行して以下の様なエラーが表示された場合は、VirtualBoxやVMWareなどの仮想環境ソフトウェアがインストールされていないです。よってまずこれらをインストールする必要があります。
No usable default provider could be found for your system.
Vagrant relies on interactions with 3rd party systems, known as "providers",
to provide Vagrant with resources to run development environments.
Examples are VirtualBox, VMware, Hyper-V.
...以下省略...
vagrant upが無事に実行されると、以下の様なメッセージがずらずらと表示されます。最初に上記で指定したboxをダウンロードしています。
$ vagrant up
Bringing machine 'default' up with 'virtualbox' provider...
==> default: Box 'ubuntu/trusty64' could not be found. Attempting to find and install...
    default: Box Provider: virtualbox
    default: Box Version: >= 0
==> default: Loading metadata for box 'ubuntu/trusty64'
    default: URL: https://atlas.hashicorp.com/ubuntu/trusty64
==> default: Adding box 'ubuntu/trusty64' (v14.04) for provider: virtualbox
    default: Downloading: https://atlas.hashicorp.com/ubuntu/boxes/trusty64/versions/14.04/providers/virtualbox.box
    default: Progress: 1% (Rate: 796k/s, Estimated time remaining: 0:12:16)
boxの追加が完了した時点で以下のようなメッセージが表示されていると思います。
    default: Downloading: https://atlas.hashicorp.com/ubuntu/boxes/trusty64/versions/14.04/providers/virtualbox.box
==> default: Successfully added box 'ubuntu/trusty64' (v14.04) for 'virtualbox'!
...
boxの追加が完了するとそのまま仮想マシンのインストールと起動がはじまります。そして最終的に以下のように色々メッセージが表示されて起動も完了します。
..
==> default: Checking if box 'ubuntu/trusty64' is up to date...
==> default: Clearing any previously set forwarded ports...
==> default: Fixed port collision for 22 => 2222. Now on port 2200.
==> default: Clearing any previously set network interfaces...
==> default: Preparing network interfaces based on configuration...
    default: Adapter 1: nat
==> default: Forwarding ports...
    default: 22 => 2200 (adapter 1)
==> default: Booting VM...
==> default: Waiting for machine to boot. This may take a few minutes...
    default: SSH address: 127.0.0.1:2200
    default: SSH username: vagrant
    default: SSH auth method: private key
    default: Warning: Connection timeout. Retrying...
==> default: Machine booted and ready!
GuestAdditions 4.3.20 running --- OK.
==> default: Checking for guest additions in VM...
==> default: Mounting shared folders...
    default: /vagrant => /Users/vagrant/ubuntu-vagrant
あとは以下のコマンドで作成した仮想マシンにsshでログインします。
$ vagrant ssh
無事にログインできればvagrantによる仮想マシンの作成は完了です。
仮想マシンを停止する場合は、仮想マシン上でshutdown -h nowしてもいいですし、仮想マシンからログアウトして以下のコマンドを実行してもOKです。
$ vagrant halt
また、作成した仮想マシンを破棄したい場合は以下のコマンドを実行します。
$ vagrant destroy
Vagrantfileを修正した場合は、以下のコマンドで仮想マシンを再起動します。
$ vagrant reload
なお、Vagrantfileで指定できる仮想マシンの設定についてよく使うものをこちら(よく使うVagrantfileの設定のまとめ)にまとめたので必要な方はみてみてください。
おわりに
vagrantのインストールと仮想マシンを作成するまでに必要な手順はだいぶ簡単になった気がします。お手軽に開発環境を構築する上で重宝するのでおすすめです。
関連記事
 公開日:2020/01/22 更新日:2020/01/22
Vagrant upしたら「VirtualBox is complaining that the kernel module is not loaded.」が出る時の対処方法
Ubuntu18.04上でVagrantの仮想マシンを起動しようとしたところ、<code>VirtualBox is complaining that the kernel module is not loaded.</code>というエラーが出ました。この記事ではこの解決策をまとめます。
 公開日:2019/12/27 更新日:2019/12/27
Windows10のWSLをWSL2に変換する手順
Windows上でLinux環境を使用できるWSL(Windows Subsystems for Linux)の新しいバージョンであるWSL2が2019年6月からWindows10のプレビュー版で使用可能になっています。この記事では、WSL1をWSL2に変換する手順をまとめます。
 公開日:2019/12/23 更新日:2019/12/23
SyncthingをWindowsにインストールして使うまでの手順
ローカルのデバイス同士でファイルを同期、共有できるSyncthing用のクライアントアプリをWindows10にインストールしたのでその手順をまとめます。
 公開日:2019/11/08 更新日:2019/11/08
通信経路を匿名化できるTorブラウザをWindows10にインストールする手順
Tor(トーア)は自身のアクセス元、IPアドレスを匿名化してインターネットに接続できるブラウザです。この記事ではTorをWindows10にインストールする手順をまとめます。
 公開日:2019/11/04 更新日:2019/11/04
Windows10でInsider Programに登録して最新のビルド版をインストールする方法
MicrosoftはWindows Insider Programを用意しており、登録することでWindowsの最新ビルド版を使用することができます。この記事では、Windows Insider Programに登録して最新のビルド版をインストールする手順をまとめます。