Ubuntu18.04にFlutterの開発環境を構築する手順

はじめに
Flutterは、Googleが開発しているモバイルアプリケーションフレームワークです。Flutterを使ってモバイルアプリケーションを開発することで、iOSとAndroidの両方で動作するアプリを単一のコード(Dartという言語を使用)から構築することができます。この記事では、Flutterによる開発環境をUbuntu18.04上に構築するための手順についてまとめます。
できるようになること
Ubuntu18.04上にFlutterの開発環境を構築します。この記事では実際にAndroidの実機上でサンプルプログラム等を動作させるところまでは載せていません。
前提と環境
以下の通りです。
- FlutterをインストールするOS:Ubuntu18.04
- Android Studio、もしくはVisual Studio Codeのいずれかをインストール済とする
事前準備
基本的な手順は公式ドキュメントに従って行います。
まず、FlutterをUbuntuにインストールするにあたって必要な要件が公式ドキュメントに記載されています。
- Operating Systems: Linux (64-bit)
- Disk Space: 600 MB (does not include disk space for IDE/tools).
- Tools: Flutter depends on these command-line tools being available in your environment.
- bash
- curl
- git 2.x
- mkdir
- rm
- unzip
- which
- xz-utils
- Shared libraries: Flutter test command depends on this library being available in your environment.
- libGLU.so.1 - provided by mesa packages e.g. libglu1-mesa on Ubuntu/Debian
上記にあるようにいくつか事前にインストールが必要なパッケージがありますが、すでにUbuntuを開発用に使用している場合はインストール済の場合だと思います。もし足らないパッケージがある場合は、apt経由でインストールしておきます。例えば、xz-utilsとlibglu1-mesaがないのであれば以下のようにインストールします。
$ sudo apt install xz-utils libglu1-mesa
入っているか不明なパッケージがあれば、一度aptでインストールして確認してみてください。
Flutterをダウンロードする
冒頭に載せた公式ドキュメント内に、以下のようにFlutterのダウンロードボタンがあるのでそれをクリックしてダウンロードします。2019年5月2日時点ではflutter_linux_v1.2.1-stable.tar.xz<というファイルがダウンロードできます。

もしくは、wgetなどでダウンロードしてもOKです。
$ wget https://storage.googleapis.com/flutter_infra/releases/stable/linux/flutter_linux_v1.2.1-stable.tar.xz
以下が実行結果です。
$ wget https://storage.googleapis.com/flutter_infra/releases/stable/linux/flutter_linux_v1.2.1-stable.tar.xz
--2019-05-02 16:40:28--  https://storage.googleapis.com/flutter_infra/releases/stable/linux/flutter_linux_v1.2.1-stable.tar.xz
storage.googleapis.com (storage.googleapis.com) をDNSに問いあわせています... 2404:6800:4004:80e::2010, 172.217.31.144
storage.googleapis.com (storage.googleapis.com)|2404:6800:4004:80e::2010|:443 に接続しています... 接続しました。
HTTP による接続要求を送信しました、応答を待っています... 200 OK
長さ: 279267644 (266M) [application/x-gtar]
'flutter_linux_v1.2.1-stable.tar.xz' に保存中

flutter_linux_v1.2.1-stable.tar.  13%[=======>                                                   ]  37.07M  7.48MB/s    残り31s
続いてダウンロードしたファイルを適当なディレクトリに解凍します。ここでは、ホームディレクトリ以下の~/workspace/developmentというディレクトリ下に解凍します。
$ cd ~/workspace/development
$ tar xf ~/Downloads/flutter_linux_v1.2.1-stable.tar.xz
上記で解凍すると、flutterというディレクトリが~/workspace/developmentに解凍されます。
次にflutterディレクトリへのパスを~/.bashrcの末尾に追記します。ここでは~/workspace/development/flutter/binへパスを通していますが、flutterディレクトリを設置した場所に読み替えてください。
export PATH="$PATH:$HOME/workspace/development/flutter/bin"
sourceで~/.bashrcを再読込して反映します。
$ source ~/.bashrc
公式ドキュメントでは、必要ならば以下を実行するよう書かれていますが、こちらはインターネットに自由に接続できないなどの環境の場合に事前に必要なパッケージをダウンロードするためのものになります。
$ flutter precache
動作確認としてflutterコマンドを実行してみると、使い方が表示されます。
$ flutter
Manage your Flutter app development.

Common commands:

flutter create <output directory>
Create a new Flutter project in the specified directory.

flutter run [options]
Run your Flutter application on an attached device or in an emulator.

Usage: flutter <command> [arguments]

Global options:
-h, --help                  Print this usage information.
-v, --verbose               Noisy logging, including all shell commands executed.
                            If used with --help, shows hidden options.
(...以下省略...)
Flutterの環境チェックを行う
ここでFlutterの開発環境構築に必要な他のステップを確認するために、doctorコマンドを実行します。
$ flutter doctor
doctorコマンドの結果として以下が表示されます。
$ flutter doctor
Doctor summary (to see all details, run flutter doctor -v):
[!] Flutter (Channel stable, v1.2.1, on Linux, locale ja_JP.UTF-8)
    ✗ Downloaded executables cannot execute on host.
      See https://github.com/flutter/flutter/issues/6207 for more information
      On Debian/Ubuntu/Mint: sudo apt-get install lib32stdc++6
      On Fedora: dnf install libstdc++.i686
      On Arch: pacman -S lib32-libstdc++5 (you need to enable multilib:
      https://wiki.archlinux.org/index.php/Official_repositories#multilib)

[!] Android toolchain - develop for Android devices (Android SDK version 28.0.3)
    ✗ Android licenses not accepted.  To resolve this, run: flutter doctor --android-licenses
[!] Android Studio (version 3.4)
    ✗ Flutter plugin not installed; this adds Flutter specific functionality.
    ✗ Dart plugin not installed; this adds Dart specific functionality.
[!] VS Code (version 1.33.1)
    ✗ Flutter extension not installed; install from
      https://marketplace.visualstudio.com/items?itemName=Dart-Code.flutter
[!] Connected device
    ! No devices available

! Doctor found issues in 5 categories.
見てわかるとおり全て罰がついていますが、どのような対応が必要かも丁寧に記載されているため簡単に修正可能です。
✗ Downloaded executables cannot execute on hostへの対応
flutter doctorの実行結果に記載があるとおり、lib32stdc++6というパッケージをインストールします。
$ sudo apt install lib32stdc++6
✗ Android licenses not accepted対応
以下のコマンドを実行して、利用規約を確認します。何度かAccept? (y/N):と表示されて利用規約に同意するか確認されるので、よければyと入力してEnterを押して進めます。
$ flutter doctor --android-licenses
Warning: File /home/albion/.android/repositories.cfg could not be loaded.
5 of 5 SDK package licenses not accepted. 100% Computing updates...
Review licenses that have not been accepted (y/N)? y

(...途中省略...)

14.7 This License Agreement, and your relationship with Google under this License Agreement, shall be governed by the laws of the State of California without regard to its conflict of laws provisions. You and Google agree to submit to the exclusive jurisdiction of the courts located within the county of Santa Clara, California to resolve any legal matter arising from this License Agreement. Notwithstanding this, you agree that Google shall still be allowed to apply for injunctive remedies (or an equivalent type of urgent legal relief) in any jurisdiction.


August 15, 2011
---------------------------------------
Accept? (y/N):
最終的に、以下のようにAll SDK package licenses acceptedと表示されれば完了です。
---------------------------------------
Accept? (y/N): y
All SDK package licenses accepted
✗ Flutter extension not installed
Android Studioについて以下の2つに✗ついています。
✗ Flutter plugin not installed; this adds Flutter specific functionality.
✗ Dart plugin not installed; this adds Dart specific functionality.
これはAndroid StudioにFluterとDart言語のプラグインがインストールされていないという警告です。Android Studioを開発用に使いたい方は対応が必要です。
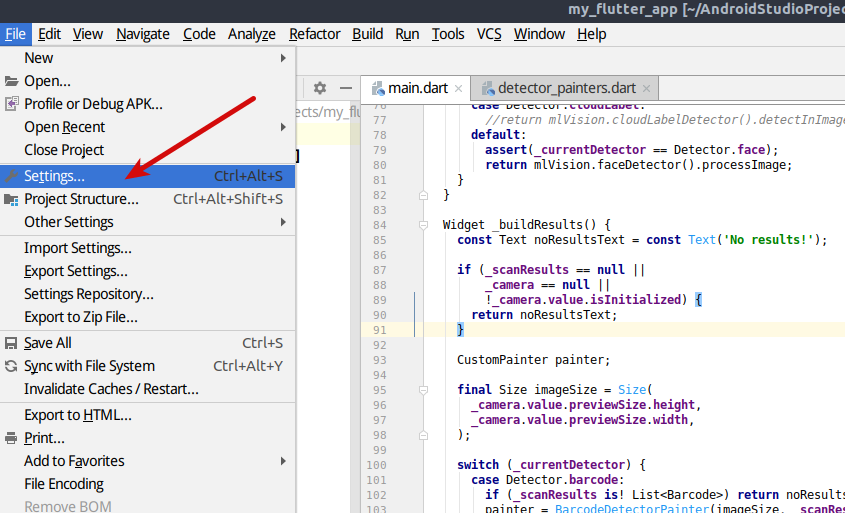
インストールは簡単です。はじめに、Android Studioを起動し、以下のようにメニューの「File」から「Settings」をクリックします。
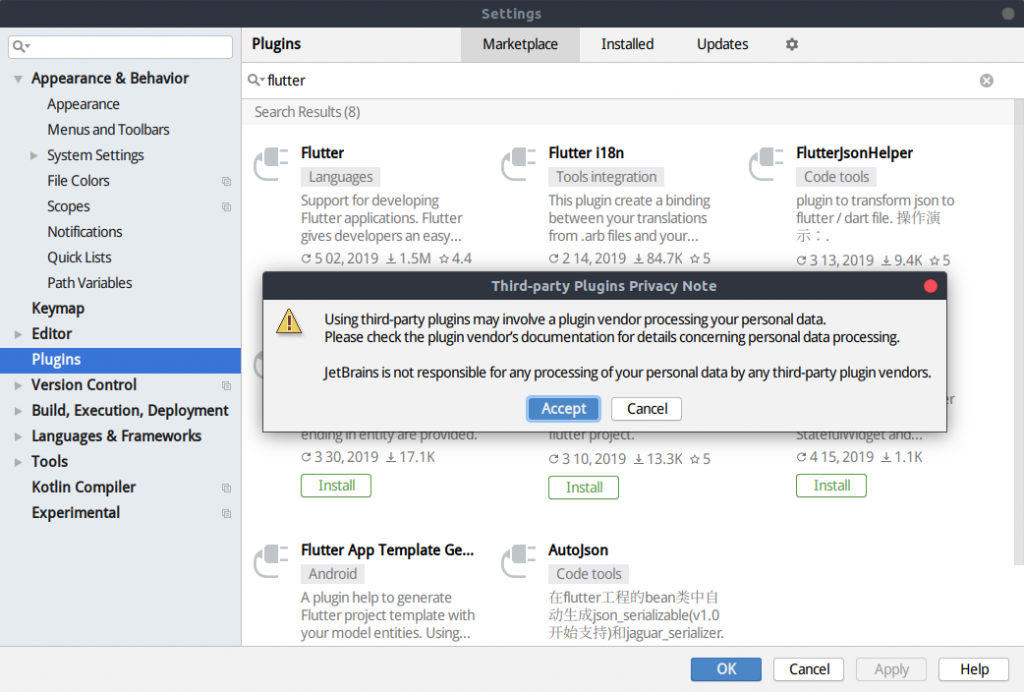
すると以下のようなウィンドウが開くので、左側のリストから「Plugins」をクリックして、検索バーに「flutter」と入力します。すると以下のようにFlutterのプラグインが表示されるので「Install」をクリックします。

プラグインによって作成するアプリに関する情報がプラグイン提供者に取得される可能性があるが問題ないかという確認がでるのでよければ「Accept」をクリックします。
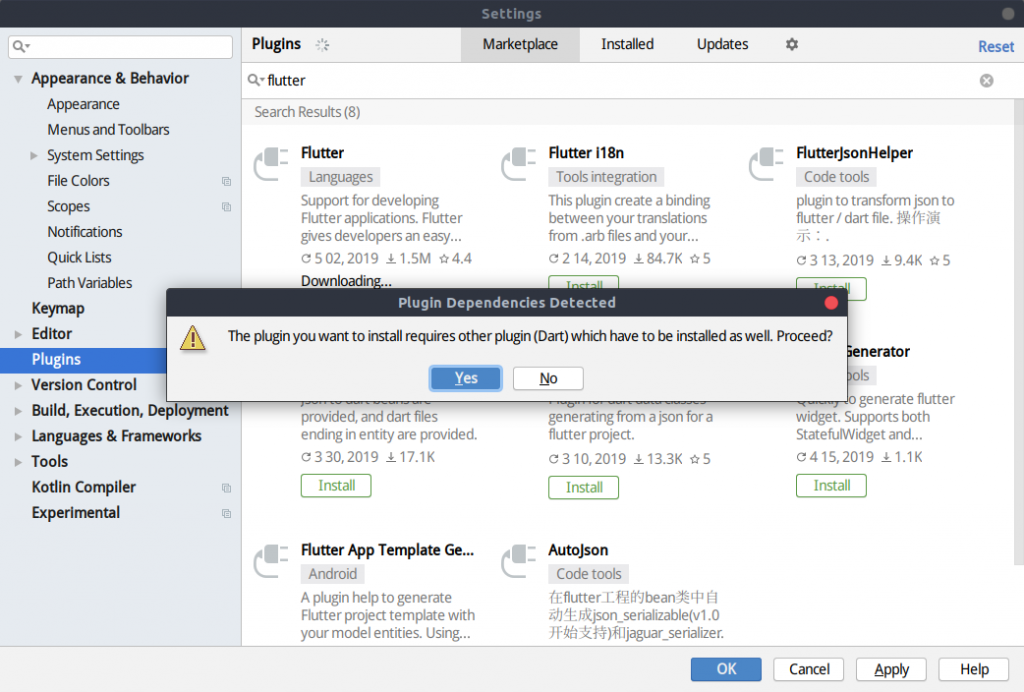
Dart用のプラグインも一緒にインストールするがOKかという確認がでるのでよければ「Yes」をクリックします。
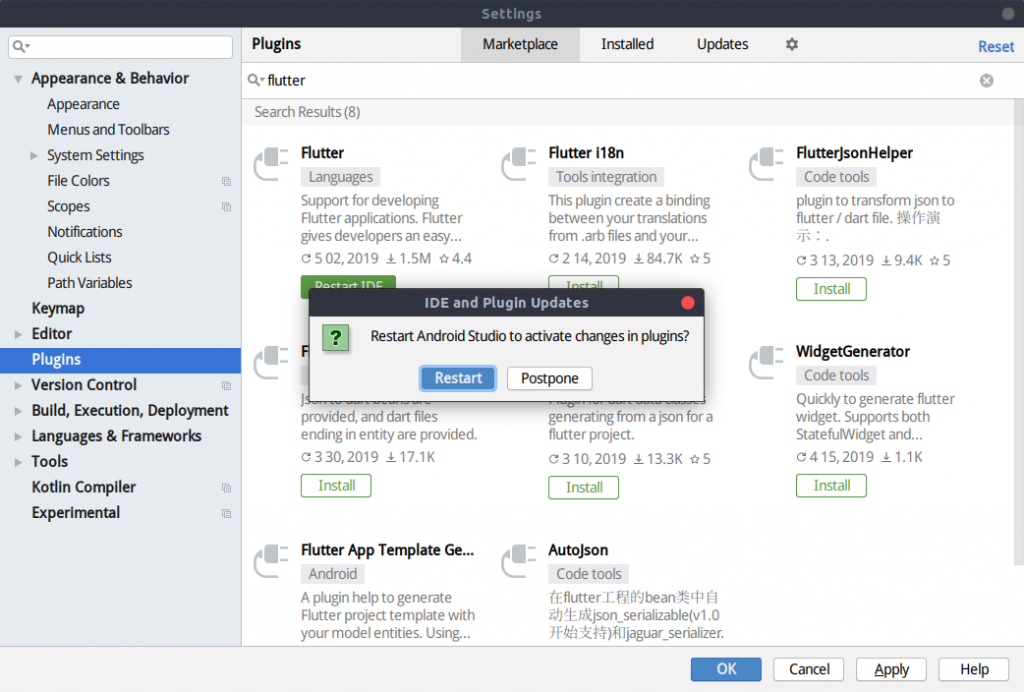
プラグインのインストールが完了すると、以下のように「Restart IDE」というボタンが表示されるので、これをクリックしてAndroid Studioを再起動します。
再起動するという確認ができるので「Restart」をクリックします。
以上でAndroid Studioへのプラグインのインストールは完了です。
✗ Flutter extension not installed
Microsoft社のVS CodeにFlutter用の拡張機能がインストールされていないという意味です。VS Codeを開発用に使いたい方は対応が必要です。 よってFlutter用の拡張機能をインストールします。VS Codeを開いて以下のように拡張機能検索バーで「flutter」と入力し、インストールします。

以上で完了です。
! No devices available
これはiOSまたはAndroidがインストールされた実機がパソコンに接続されていないという警告ですので、USBケーブルなどで接続します。UbuntuではAndroid実機のみ対応可能です。
最終的に以下のようになれば完了です。Android Studio、VS Codeのどちかは未対応でも問題ありません。
$ flutter doctor
Doctor summary (to see all details, run flutter doctor -v):
[✓] Flutter (Channel stable, v1.2.1, on Linux, locale ja_JP.UTF-8)
[✓] Android toolchain - develop for Android devices (Android SDK version 28.0.3)
[✓] Android Studio (version 3.4)
[✓] VS Code (version 1.33.1)
[✓] Connected device (1 available)

• No issues found!
以上でFlutterの開発環境の構築は完了です。
まとめ
公式ドキュメントが充実していることもあり環境構築自体は思っていたよりも簡単に進められると思います。関連記事
 公開日:2022/08/30 更新日:2022/08/30
FlutterアプリでAndroid StudioのGenerate Signed Bundle/APKが表示されない時の対処法
FlutterアプリをGoogle Play Storeに公開するためにAndroid Studioを使ってアップロード鍵を生成しようとしたところ、公式ドキュメントに書かれている「Build」→「Generate Signed Bundle/APK」というメニューが見つかりませんでした。この解決法をメモします。
 公開日:2022/08/15 更新日:2022/08/15
webview_flutterを使ってFlutterアプリ内でWebページを開く
FlutterでURLをタップした時にアプリ内でそのURLのWebページを開く方法についてまとめます。この記事では、Flutter公式のプラグインであるwebview_flutterを使用した実装例をメモします。
 公開日:2022/08/14 更新日:2022/08/14
FlutterでURLへのリンクを作成してアプリ外でWebページを開く
FlutterでURLをタップしたらブラウザが開いてそこでURL先を表示したい場合があります。この記事では、Flutter公式のプラグインを使用した実装例をメモします。
 公開日:2020/02/10 更新日:2020/02/10
UbuntuをmacOSのCatalinaっぽい見た目にする
UbuntuのデスクトップをmacOSのCatalinaっぽくするためのカスタマイズ手順をまとめます。
 公開日:2019/12/31 更新日:2019/12/31
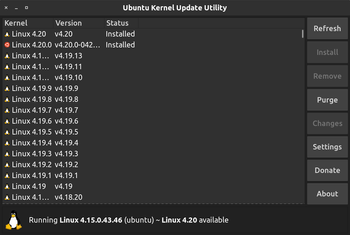
How to update Ubuntu's Kernel only
This article show you how to update Ubuntu's kernel using ukuu(Ubuntu Kernel Update Utility).