Flutterで入力フォームのバリデーション等のカスタマイズ例

Photo by NeONBRAND on Unsplash
はじめに
Flutterでテキストフィールドや数値用のフォームを作成し、バリデーションや各フォームで指定てきるオプションなどについてまとめます。
できるようになること
以下のGIF画像のようなフォームを作成します。また、各フォームにバリデーションを設定します。
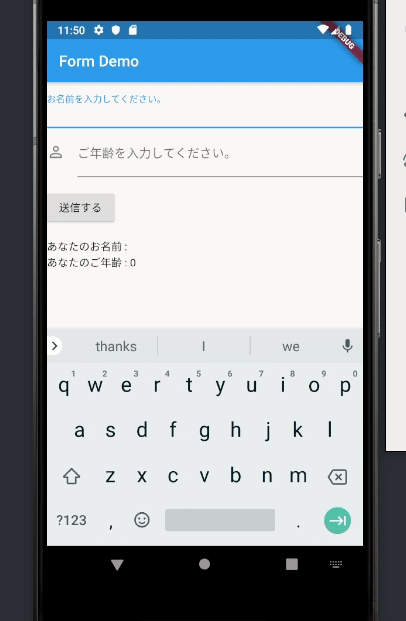
上記GIFのデモの動作としては以下のような動作が可能になっています。
- 最初のテキストフィールドの入力完了後、自動で次のフォームにフォーカスを移動する
- 各フォームの内容をバリデーションチェックする
- バリエーションが通らなければ指定したメッセージを各フォームで表示する
- フォームの入力内容を画面に表示する
上記のデモの全体のコードはGitHubにあげています。追加でインストールが必要なパッケージはありません。
参考文献
以下のページを主に参考にさせて頂きました。Flutterの公式ドキュメントが充実しており毎度助かっています。
Apps often require users to enter information into a text field. Forexample, we might be working on an app that requires our users to log in with anemail address and password combination.In order to make our apps secure and easy to use, we can check whether theinformation the user has...
When a text field is selected and accepting input, it is said to have focus.Generally, users can focus text fields by tapping on them, and developerscan focus text fields using the tools described in this recipe.Managing focus is a fundamental tool for creating forms with an intuitiveflow. For example, say...
In my previous posts, I introduced the MVP architecture pattern and handling the key actions & next focus with the text Fields. Today, I…
前提と環境
以下の通りです。
- Flutter 1.5.4-hotfix.2
- Dart 2.3.0
Formウィジェットを使用する準備
上記のデモでは、FlutterのFormウィジェットを使用しています。そしてFormウィジェットの中でTextFormFieldを使用しています。これらについては参考文献にも載せた公式ドキュメントに詳しく書かれています。
簡単にまとめると、以下のようにはじめにGlobalKeyを準備します。これは各フォームを一意に識別するためのキーになります。
さらに、各フォームのフォーカス状態を管理するためにFocusNode()も準備します。ここでは、後ほどお名前入力フォームと年齢入力フォームの2つを使うため、それぞれのFocusNode()を準備しています。
class MyCustomFormState extends State {
 // Formウィジェット内の各フォームを識別するためのキーを設定
  final _formKey = GlobalKey();

  // フォーカス管理用のFocusNode
  final namefocus = FocusNode();
  final agefocus = FocusNode();

(...以下省略...)
そして後は各フォームを作成します。
シンプルなフォームの作成
以下にシンプルなフォームの例を載せます。以下のコードは公式ドキュメントのサンプルコードとほぼ同じものになります(Building a form with validation - Flutter)。一部コメントのみ日本語に直しています。
// コード全体はGitHub参照

(...以上省略...)

class MyCustomFormState extends State {
// Formウィジェット内の各フォームを識別するためのキーを設定
  final _formKey = GlobalKey();

  // フォーカス管理用のFocusNode
  final namefocus = FocusNode();
  final agefocus = FocusNode();

 @override
  Widget build(BuildContext context) {
    return Form(
      key: _formKey, // 作成したフォームキーを指定
      child: Column(
        crossAxisAlignment: CrossAxisAlignment.start,
        children: [
          TextFormField(
            validator: (value) {
              if (value.isEmpty) {
                return 'テキストを入力してください。';
              }
            },
          ),
          Padding(
            padding: const EdgeInsets.symmetric(vertical: 16.0),
            child: RaisedButton(
              // 送信ボタンクリック時の処理
              onPressed: () {
                // バリデーションチェック
                if (_formKey.currentState.validate()) {
                  // バリデーションが通ればスナックバーを表示
                  Scaffold.of(context)
                      .showSnackBar(SnackBar(content: Text('更新しました。')));
                }
              },
              child: Text('送信する'),
            ),
          )
        ],
      ),
    );
  }
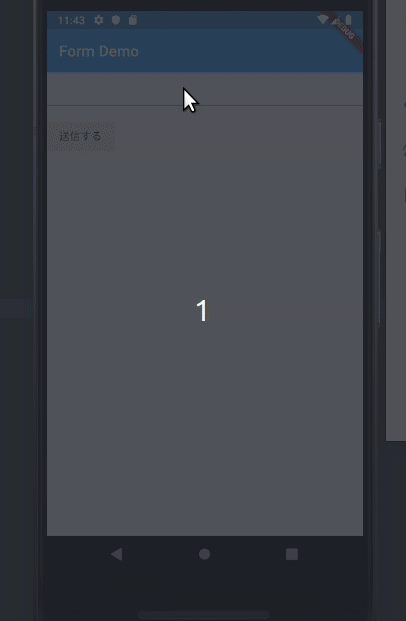
上記のコードだと以下のような動作になります。上記の例のコードではFocusNodeはまだ使用していません。
色々なオプションを指定したフォーム例
冒頭に載せたデモのコードを載せます。基本的な説明はコメントに記載しています。なお、全体のコードは冒頭に載せたGitHub上に載せています。
以下のコードでは、TextFormField nameFormFieldとTextFormField ageFormFieldというフォームを作成してウィジェット内で呼んでいます。
// コード全体はGitHub参照

(...以上省略...)

class MyCustomFormState extends State {

  // Formウィジェット内の各フォームを識別するためのキーを設定
  final _formKey = GlobalKey();

  // フォーカス管理用のFocusNode
  final namefocus = FocusNode();
  final agefocus = FocusNode();

  // デモ用の適当な変数
  var _yourAge = 0;
  var _yourName = '';

 // 名前更新用メソッド
  void _updateName(String name) {
    setState(() {
      _yourName = name;
    });
  }
  // 年齢更新用メソッド
   void _updateAge(int age) {
    setState(() {
      _yourAge = age;
    });
  }

  @override
  Widget build(BuildContext context) {
    // Build a Form widget using the _formKey we created above
    return Form(
      key: _formKey,
      child: Column(
        crossAxisAlignment: CrossAxisAlignment.start,
        children: [
          nameFormField(context),
          ageFormField(context),
          Padding(
            padding: const EdgeInsets.symmetric(vertical: 16.0),
            child: RaisedButton(
              // 送信ボタンクリック時の処理
              onPressed: () {
                // バリデーションチェック
                if (_formKey.currentState.validate()) {
                  // 各フォームのonSavedに記述した処理を実行
                  // このsave()を呼び出さないと、onSavedは実行されないので注意
                  _formKey.currentState.save();
                  Scaffold.of(context)
                      .showSnackBar(SnackBar(content: Text('更新しました。')));
                }
              },
              child: Text('送信する'),
            ),
          ),
          Text("あなたのお名前 : " + _yourName),
          Text("あなたのご年齢 : " + _yourAge.toString()),
        ],
      ),
    );
  }

TextFormField nameFormField(BuildContext context) {
  return TextFormField(
    // ここでは使用しないが、コントローラももちろん使用可能
    // controller: _nameController,

    // テキスト入力完了して決定時のボタンの見た目等指定。後述。
    textInputAction: TextInputAction.next,

    // フォームを含むウィジェットが作成された時点でフォーカスする。
    autofocus: true,

    // フォームの装飾を定義。後述のageFormFieldで他のオプションも紹介
    decoration: InputDecoration(
      labelText: "お名前を入力してください。",
      // 以下でエラーメッセージのスタイルを指定可
      // errorStyle: TextStyle(fontSize: 16.0, color: Colors.black)
    ),
    focusNode: namefocus,
    onFieldSubmitted: (v){
      // フォーム入力完了後、agefocusにフォーカスを移す。
      // すなわち年齢入力フォームにフォーカスを移動する。
      // agefocusは作成済のFocusNode
      FocusScope.of(context).requestFocus(agefocus);
    },
    // 入力内容に対するバリデーション
    validator: (value) {
      // 入力内容が空でないかチェック
      if (value.isEmpty) {
        return 'テキストを入力してください。';
      }
    },
    // _formKey.currentState.save() 呼び出し時に実行する処理
    onSaved: (value) {
      _updateName(value);
    },
  );
}

TextFormField ageFormField(BuildContext context) {
  return TextFormField(
    // キーボードタイプを指定。ここではnumberを指定しており、数字キーボードを表示
    // 一覧はhttps://api.flutter.dev/flutter/services/TextInputType-class.html
    keyboardType: TextInputType.number,
    // テキスト入力完了時の動作、ボタン見た目の指定
    textInputAction: TextInputAction.done,
    focusNode: agefocus,
    onFieldSubmitted: (v){
      // 年齢フォームからフォーカスを外し、キーボードをしまう
      agefocus.unfocus();
    },
    validator: (value) {
      // 年齢が10歳以上であるか確認
      if (value.length == 0 || int.parse(value) <= 10) {
        return ('年齢は10歳以上である必要があります。');
      }
    },
    // フォームの装飾を定義
    decoration: InputDecoration(
      labelText: "ご年齢を入力してください。",
      hintText: 'ご年齢(10歳以上)',
      icon: Icon(Icons.person_outline),
      fillColor: Colors.white,
    ),
    onSaved: (value) {
      _updateAge(int.parse(value));
    },
  );
}

}
以降でいくつかのオプションについて補足説明を載せます。
textInputActionについて
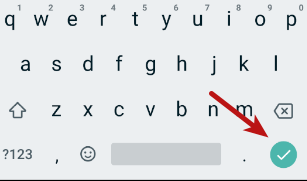
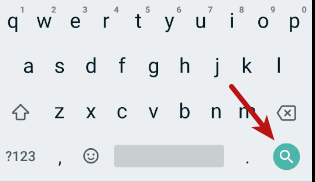
このオプションは、テキスト入力を完了する際に表示するボタン(公式ドキュメントではaction buttonと記載されています。)の見た目を変更します。また見た目だけでなく論理的な意味も提示するためのオプションであると公式ドキュメントには記載されています。例えば以下の様なオプションを指定できます。
ただし、このボタンの見た目はiOS、Androidでも異なり、さらに同じOSでもバージョンによって異なります。
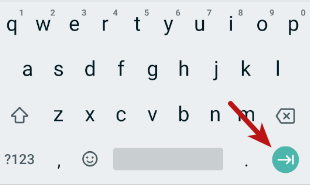
textInputActionと実装する動作の意味は合わせるべきであると公式ドキュメントに記載されています。他のオプションについても以下の公式ドキュメントに記載されています。
An action the user has requested the text input control to perform.
keyboardTypeについて
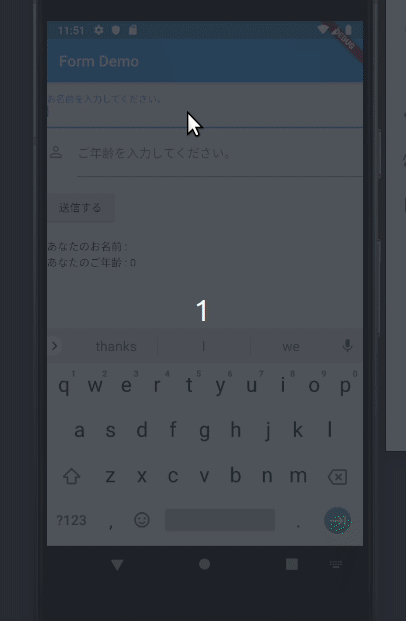
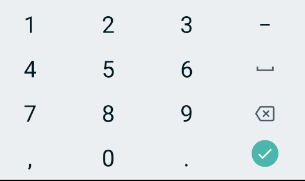
表示するキーボードタイプを指定できます。例えば数値を入力させたい場合に、keyboardType: TextInputType.numberと指定すれば以下のように数字のみのキーボードを表示することが可能です。
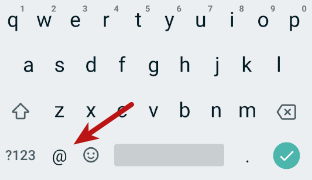
オプションとしてはnumber以外にもemailAddressやphoneなど他にも色々と用意されています。ただし、これはバリデーションなどの機能はついておらず、キーボードの表示のみが変わります。emailAddressの指定をすると、以下のように@が最初から表示されていたり、phoneの場合は*と#が最初から表示されている数値キーボードが表示されます。
The type of information for which to optimize the text input control.
validatorについて
以下のようにvalidatorで自由にバリデーションルールを設定できます。valueが入力内容になります。
validator: (value) {
      // 年齢が10歳以上であるか確認
      if (value.length == 0 || int.parse(value) <= 10) {
        // バリデーションが通らない場合に表示するメッセージ
        return ('年齢は10歳以上である必要があります。');
      }
    },
まとめ
最初から用意されているオプションが多く、大体のフォームの実装は簡単にできると思います。
関連記事
 公開日:2022/08/30 更新日:2022/08/30
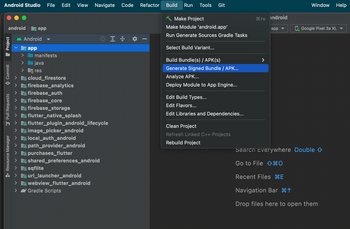
FlutterアプリでAndroid StudioのGenerate Signed Bundle/APKが表示されない時の対処法
FlutterアプリをGoogle Play Storeに公開するためにAndroid Studioを使ってアップロード鍵を生成しようとしたところ、公式ドキュメントに書かれている「Build」→「Generate Signed Bundle/APK」というメニューが見つかりませんでした。この解決法をメモします。
 公開日:2022/08/15 更新日:2022/08/15
webview_flutterを使ってFlutterアプリ内でWebページを開く
FlutterでURLをタップした時にアプリ内でそのURLのWebページを開く方法についてまとめます。この記事では、Flutter公式のプラグインであるwebview_flutterを使用した実装例をメモします。
 公開日:2022/08/14 更新日:2022/08/14
FlutterでURLへのリンクを作成してアプリ外でWebページを開く
FlutterでURLをタップしたらブラウザが開いてそこでURL先を表示したい場合があります。この記事では、Flutter公式のプラグインを使用した実装例をメモします。
 公開日:2019/12/03 更新日:2019/12/03
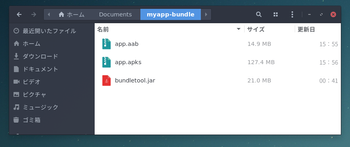
Android App Bundleを実機にインストールして試すために使うbundletoolの使い方
Flutterなどで開発したAndroidアプリを自分の手元にある実機にインストールして試したい場合はbundletoolを使用するよう公式ドキュメントに記載されています。ただ、常識であるためなのか詳しい使い方が書かれておらず戸惑ったのでメモしておきます。
 公開日:2019/12/02 更新日:2019/12/02
Flutterでアプリの復帰やサスペンドを検出して処理を実行する
Flutterで開発したアプリが復帰した時やサスペンドした時を検出して任意の処理を実行するための手順をまとめます。