Ubuntu18.04にDockerをインストールする手順
はじめに
はじめはわかりにくいDockerですが、とりあえず手を動かして実際に使ってみると、その良さが次第にわかります。私自身、最初は良くわからないまま使い始めましたが、その便利さを使っているうちに実感できました。そこでここではUbuntu18.04にDockerをインストールする手順をメモします。
参考サイト
基本的には以下の公式サイト通りの手順に従いました。 Get Docker CE for Ubuntu - Docker Documentation
また、そもそもDockerとは何か?については以下のサイト様がわかりやすかったです。 Docker導入のための、コンテナの利点を解説した説得資料 - Qiita@niisan-tokyo (初心者向け)Dockerの使い方 - Qiita@butada
なお、インストール方法として、aptコマンドを使ってパッケージインストールするか、もしくはインストール用のシェルスクリプトを使用する方法があります。Dockerには安定版のstable、頻繁にアップデートされ最新機能を試せるedgeがあり、aptコマンドを使う場合はstableがインストールされます。edgeをインストールするにはシェルスクリプトを使った方法を実施する必要があります。また、testingというものもあるようですが、こちらもシェルスクリプトを使った方法でのみインストール可能です。なお、testingについては特に情報がありませんでした。特に理由がない限りは基本的にstableをインストールすればOKだと思います。よって、ここではaptコマンドを使ってstableをインストールする手順をメモします。
インストール手順
はじめにupdateしておきます。
$ sudo apt update
次に必要なパッケージをインストールします。
$ sudo apt install apt-transport-https ca-certificates curl gnupg-agent software-properties-common
パッケージリストを読み込んでいます... 完了
依存関係ツリーを作成しています
状態情報を読み取っています... 完了
ca-certificates はすでに最新バージョン (20180409) です。
software-properties-common はすでに最新バージョン (0.96.24.32.3) です。
以下のパッケージが新たにインストールされます:
apt-transport-https curl
アップグレード: 0 個、新規インストール: 2 個、削除: 0 個、保留: 0 個。
160 kB のアーカイブを取得する必要があります。
この操作後に追加で 547 kB のディスク容量が消費されます。
続行しますか? [Y/n]
・・・(以下省略)・・・
続いてGPG(GNU Privacy Gard)キーを追加します。詳細は省略しますが、GPG は暗号化を行うツールです。GPGによって暗号化されているパッケージを復号化するためのキーを以下のコマンドでダウンロードし、それをapt-keyコマンドでキーに追加しています。追加されると以下のようにOKと表示されます。
$ curl -fsSL https://download.docker.com/linux/ubuntu/gpg | sudo apt-key add -
OK
追加したGPGキーのフィンガープリントを確認しておきます。冒頭に載せた公式サイトに記載されているフィンガープリントが以下のコマンドで表示されたフィンガープリントと一致していればこのキーが正しいものであることを意味します。
$ sudo apt-key fingerprint 0EBFCD88
pub rsa4096 2017-02-22 [SCEA]
9DC8 5822 9FC7 DD38 854A E2D8 8D81 803C 0EBF CD88
uid [ 不明 ] Docker Release (CE deb)
sub rsa4096 2017-02-22 [S]
Dockerのパッケージリポジトリを追加します。
$ sudo add-apt-repository \
 "deb [arch=amd64] https://download.docker.com/linux/ubuntu \
 $(lsb_release -cs) \
 stable"
無視:1 https://dl.google.com/linux/chrome/deb stable InRelease
取得:2 https://security.ubuntu.com/ubuntu bionic-security InRelease [83.2 kB]
ヒット:3 https://dl.google.com/linux/chrome/deb stable Release
ヒット:5 https://download.virtualbox.org/virtualbox/debian bionic InRelease
ヒット:6 https://jp.archive.ubuntu.com/ubuntu bionic InRelease
取得:7 https://jp.archive.ubuntu.com/ubuntu bionic-updates InRelease [83.2 kB]
ヒット:8 https://ppa.launchpad.net/daniruiz/flat-remix/ubuntu bionic InRelease
ヒット:9 https://repo.sinew.in stable InRelease
取得:11 https://download.docker.com/linux/ubuntu bionic InRelease [64.4 kB]
取得:12 https://jp.archive.ubuntu.com/ubuntu bionic-backports InRelease [74.6 kB]
ヒット:13 https://ppa.launchpad.net/hluk/copyq/ubuntu bionic InRelease
ヒット:14 https://ppa.launchpad.net/papirus/papirus/ubuntu bionic InRelease
ヒット:10 https://packagecloud.io/slacktechnologies/slack/debian jessie InRelease
ヒット:15 https://ppa.launchpad.net/rodsmith/refind/ubuntu bionic InRelease
無視:16 https://ppa.launchpad.net/shutter/ppa/ubuntu bionic InRelease
エラー:17 https://ppa.launchpad.net/shutter/ppa/ubuntu bionic Release
404 Not Found [IP: 91.189.95.83 80]
パッケージリストを読み込んでいます... 完了
・・・(以下省略)・・・
ちなみに、上記のコマンドの中のlsb_release -csは、各ディストリビューション用のリポジトリを追加できるように単純に使用しているUbuntuのディストリビューションの名前を返しています。ターミナルで実行してみると、以下のように結果が返ってきます。(以下はUbuntu18.04の場合)
$ lsb_release -cs
bionic
あとはupdateしてDockerをインストールします。
$ sudo apt update
$ sudo apt install docker-ce docker-ce-cli containerd.io
以上でDockerのインストールは完了です。試しに、Dockerのrunコマンドを使用してHello Worldを表示してみます。
$ sudo docker run hello-world
Unable to find image 'hello-world:latest' locally
latest: Pulling from library/hello-world
9bb5a5d4561a: Pull complete
Digest: sha256:f5233545e435612qwrq161e77
Status: Downloaded newer image for hello-world:latest

Hello from Docker!
This message shows that your installation appears to be working correctly.

To generate this message, Docker took the following steps:
1. The Docker client contacted the Docker daemon.
2. The Docker daemon pulled the "hello-world" image from the Docker Hub.
(amd64)
3. The Docker daemon created a new container from that image which runs the
executable that produces the output you are currently reading.
4. The Docker daemon streamed that output to the Docker client, which sent it
to your terminal.

To try something more ambitious, you can run an Ubuntu container with:
$ docker run -it ubuntu bash

Share images, automate workflows, and more with a free Docker ID:
https://hub.docker.com/

For more examples and ideas, visit:
https://docs.docker.com/engine/userguide/
上記のように表示されれば無事にインストールが完了しています。なお、簡単な使い方やよく使用するコマンドについては以下の参考サイト様に詳しくまとめられており大変参考になりました。 よく使うDockerコマンド - Qiita
以下2019/7/13追記
Dockerのコマンド実行時にエラーがでる場合
もし、Dockerのコマンド実行時に、「Couldn’t connect to Docker daemon」のようなエラーがでる場合は、以下に原因と解決策をまとめましたので参考になれば幸いです。
Dockerをいざ使おうとした時に、「ERROR: Couldn't connect to Docker daemon at http+docker://localhost - is it running?」というエラーが表示されました。この記事ではこのエラーの原因と解決方法をまとめます。
2020/1/1 追記
Docker ComposeをUbuntuにインストールする手順については以下にまとめました。
Docker ComposeをUbuntu18.04にインストールしたのでその手順をメモしておきます。docker-composeコマンドを使えるようにするまでの手順です。Docker Composeのインストール自体はとても簡単です。
まとめ
Dockerを使うことで、簡単に開発環境を構築したりデプロイしたりできるようになり大変便利です。
関連記事
 公開日:2020/02/10 更新日:2020/02/10
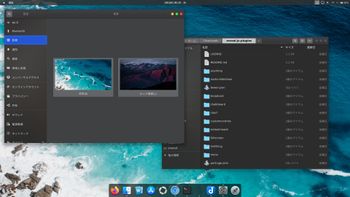
UbuntuをmacOSのCatalinaっぽい見た目にする
UbuntuのデスクトップをmacOSのCatalinaっぽくするためのカスタマイズ手順をまとめます。
 公開日:2020/01/01 更新日:2020/01/01
Docker ComposeをUbuntuにインストールする手順
Docker ComposeをUbuntu18.04にインストールしたのでその手順をメモしておきます。docker-composeコマンドを使えるようにするまでの手順です。Docker Composeのインストール自体はとても簡単です。
 公開日:2019/12/31 更新日:2019/12/31
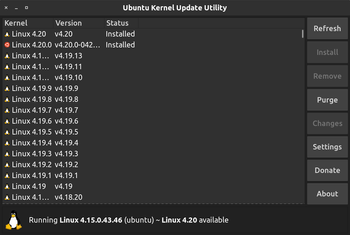
How to update Ubuntu's Kernel only
This article show you how to update Ubuntu's kernel using ukuu(Ubuntu Kernel Update Utility).
 公開日:2019/09/10 更新日:2019/09/10
Ubuntuで/var/cache/apt/archives/パッケージ名の処理中にエラーが発生した場合の対処法
Ubuntuで「dpkg: アーカイブ /var/cache/apt/archives/パッケージ名.deb の処理中にエラーが発生しました」、「Sub-process /usr/bin/dpkg returned an error code (1)」というエラーが共にでました。ここのエラーの解決策をまとめます。
 公開日:2019/08/12 更新日:2019/08/12
UbuntuからRaspberry PiにVNC接続する手順
Raspberry PiにHDMIケーブルを使ってモニタに接続して使用していましたが、ケーブルが煩わしくなってきたためリモートデスクトップで他のPCからVNC接続してみました。この記事では、UbuntuからRaspberry PiにVNC接続するまでをまとめます。